We are SO back.
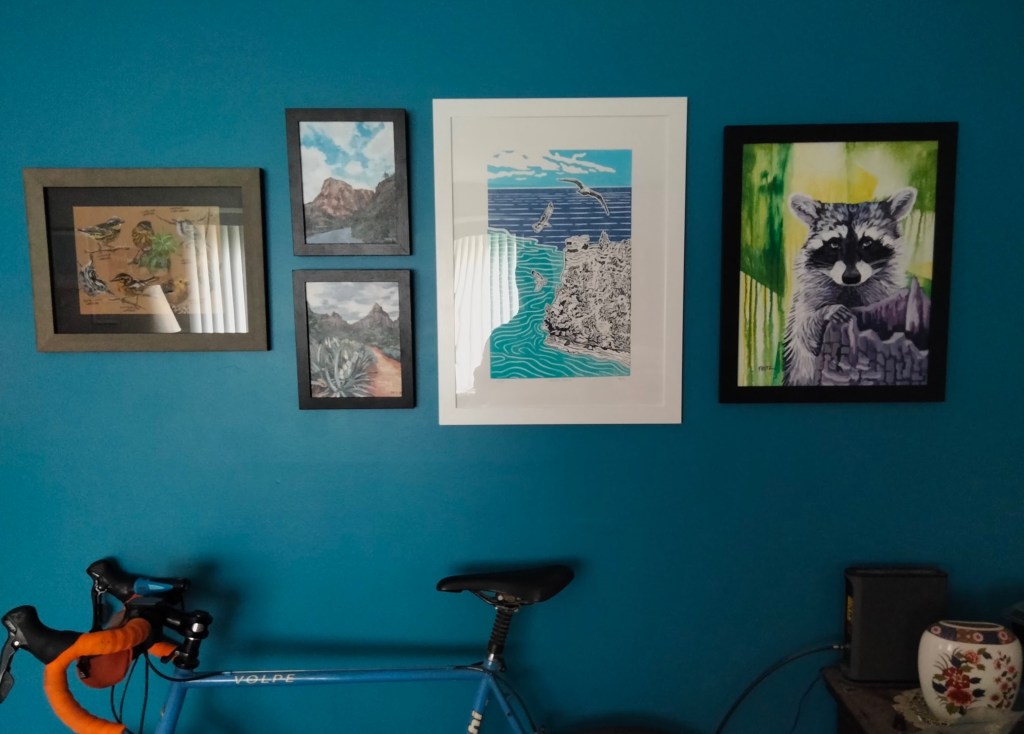
Okay okay, I hung up the gallery wall and it looks AWESOME!
And I’m going to be honest with you, I didn’t need to worry so much. And neither do you!
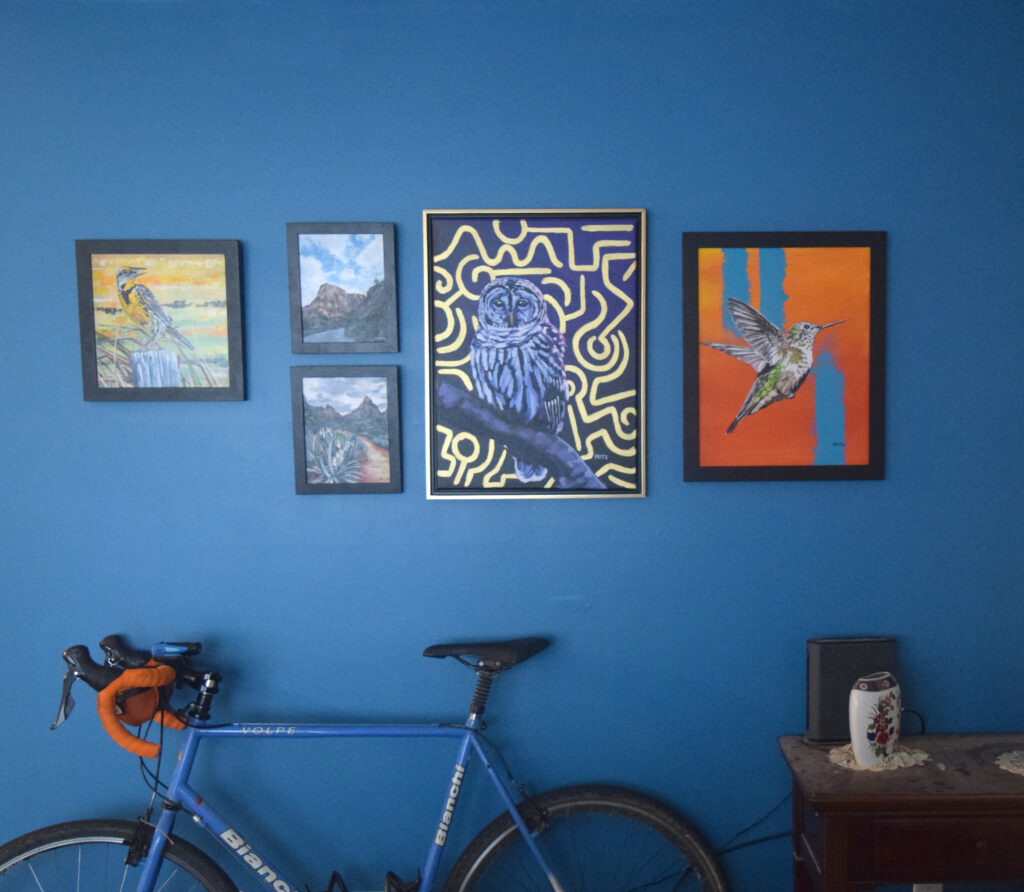
I painted the wall a nice color that’s about as bold as I can see myself living with, picked artwork, arranged it, and hung it on the wall.
It took about a day to paint the wall and an hour to hang the paintings.
Not bad at all!
And now I’m here to report back on what I’ve learned!
First off, it’s NOT going to be perfect.
I’m not telling you to give up on it looking nice, but the spacing between paintings is going to be a little uneven. No matter how many times you measure it. So don’t beat yourself up about that.
Second, it doesn’t have to be permanent.
I use a set of standard canvas and frame sizes, so I actually planned my gallery wall to accommodate those sizes so I can swap paintings in and out to keep things fresh.
Or you can set it and forget it. I totally respect that too.
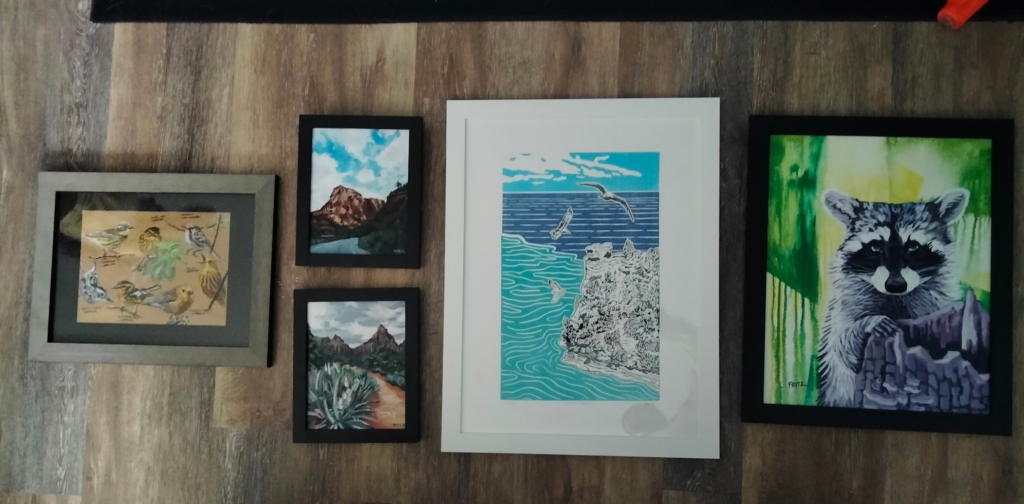
Third, plan it out on the ground, then hang on the wall.
This is an easy way to visualize the art in its arrangement before you put any nails in the wall. It can help you to play around with the spatial and visual harmonies between paintings.
My suggestion is to throw out the first arrangement. This will force your brain to come up with a couple fresher ideas to work with and allow you to have a little more fun with the process.
Notes on hanging:
Pounding nails into your wall can feel intimidating. I get you.
Here’s what I’ve learned to get it (mostly) right the first time.
Find the middle of the wall. This is the center of mass for your gallery hang.
You can do this with a tape measure. Mark it with some chalk.
Vertical center of mass should be about 57-64” from the floor.
Err on the higher end if you have something underneath the gallery wall, like I do. You can also mark this with chalk.
Find the center of mass for your arrangement and do your best to align that with the middle of the wall and your desired center-height.
This will keep you honest and from making it skewed to one side or the other.
Level it off!
A small bubble-level was super handy on this project. I set it on top of the paintings as I was hanging them to check that they were level. Pretty simple, but the attention to detail is important here.
How to hang a painting.
Alright let’s make this super quick.
- Note the hanging mechanism. If it’s wired, take note of where that wire is, in relation to the painting. Hold it by the wire in your hand so you can see where it hangs. If it’s sawtooth, you can kinda see where it’s going to hang from.
- Hold the painting up against the wall in the desired location. Keep it “hanging” on one hand, held against the wall with the other. Pull the painting up and remove it from your hand while leaving your finger touching the wall. This is the approximate location where you’ll be putting a nail. Mark this spot with chalk or pencil.
- Nail it down, hang it up! Pound a nail in the spot you marked, making sure to leave a couple millimeters protruding from the wall. Place the painting on said nail. Adjust until reasonably straight and check with a level.
Leave a Reply