So I painted the wall blue. Now what?
I am humbled.
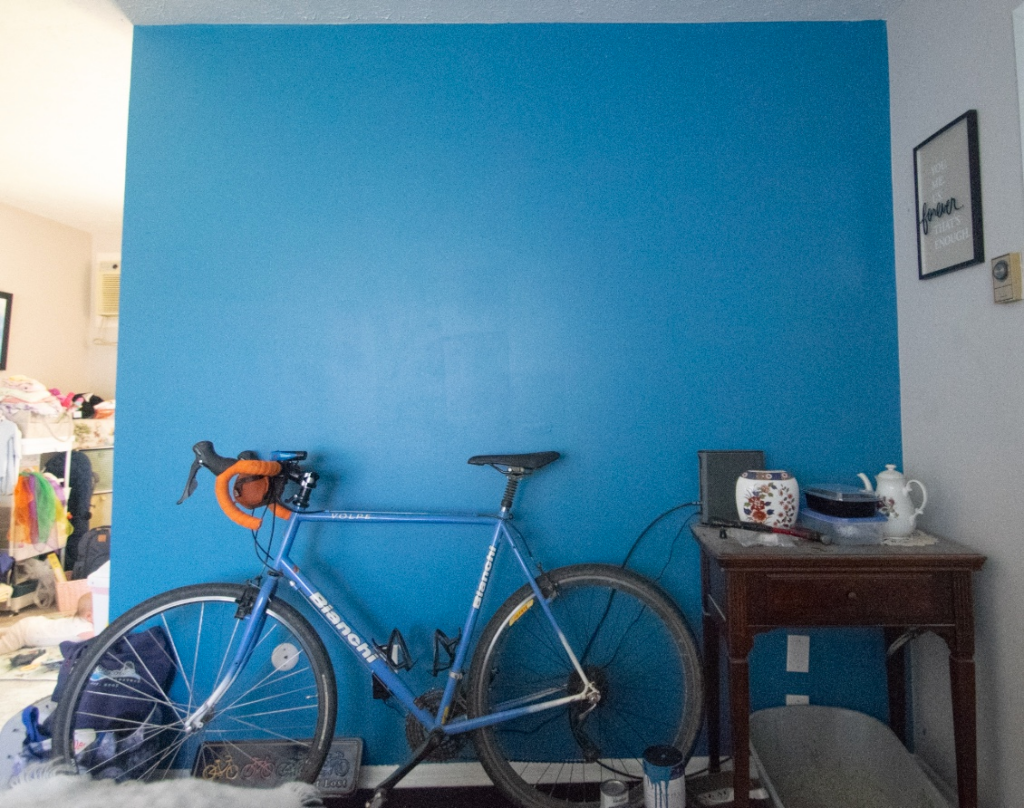
I painted the wall blue. We love it.
…Now what?
That’s actually a little overwhelming. I get it now.
How do I pick a color? How do I keep the paintings aligned?
How do I choose what to put on the wall?
Well, I’m right here with you and we’re going to figure it out together!
More specifically, I’m going to figure this out as you watch and hopefully you can gain some sort of insight or inspiration for your own home.
For the record, in case you were wondering, I haven’t done this before and I’m just flying by the seat of my pants and consulting a few web articles here and there. No asking the AI for answers, just good old fashion flocking around and finding out!
This week, I’m going to discuss objectives/goals, color choices and how to think about picking the art. We’ll get to actual hanging strategies next week.
Step One: Pick a color you love
There’s no point in making a splash with an accent wall if you hate the color.
But I don’t want you to just tolerate the color.
I want you to LOVE it!
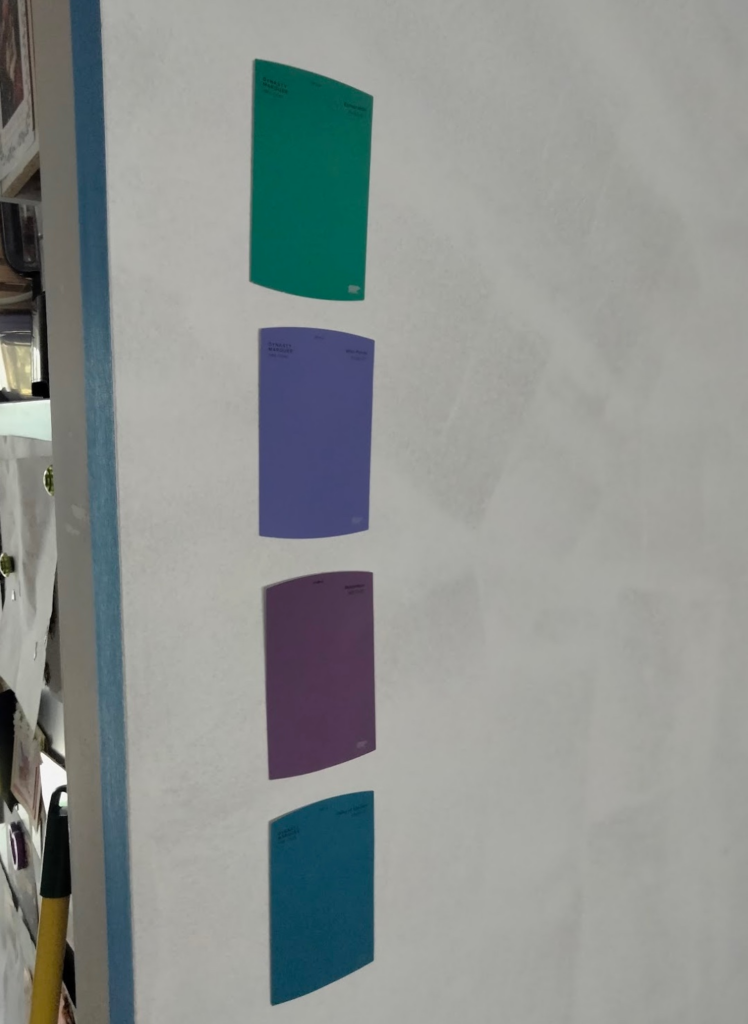
Take those paint swatches you grabbed at the hardware store and tape them to the wall.
Leave them up for a little while so you can get a better feel for how they look in different lighting conditions throughout the day.
Live with it for a minute. Discuss it. Ask a friend. Get some opinions, mull them over.
And when you’re ready, go get the appropriate amount of paint and a roller.
Step 2: Roll it on!
A NOTE ON ROLLERS:
I’ve learned a bit about rollers on this project. If you have a smooth wall, get the thin nap roller.
If you have a heavily textured wall, get the thick nap one. It makes a difference.
After picking your roller, it’s time to paint the wall. There are tons of videos online that cover this topic better than I could in text. But I think most of us know how to use a roller.
Step 3: Choose the art
Do you have some artwork that you’ve been meaning to hang up? Do you have a piece you love that you want to show off? What are you trying to do?
In my case, I’m trying to display a range of standard sizes so I can switch up the pieces for photos and studio visits. I have an 18×24, a 16×20, two 8x10s and one 11×14.
Choose a handful of pieces that mean something to you and start playing around with their arrangement on your floor. I’ve found this to be really helpful in getting my head around how the pieces relate to each other in terms of size and color.
This might also be that push that gets you to frame some art as well. This is a good thing.
Next week, we’ll discuss a couple formats for a gallery wall and hang up some paintings!
Are you enjoying this series so far? Too much info or not enough specifics?
I’m learning this as I’m teaching you, so feel free to ask any questions you might have.
Leave a Reply